Saturday, July 31, 2010

Starting An Etsy Shop: Sellers Assisting Sellers Q&A with Becky Kazana

Here is a question I've been fielding a lot lately, and not just through Sellers Assisting Sellers either. I've been hearing variations on this question at parties and through Facebook. I'm guessing many of you are interested in the answer too.

"I am considering selling on Etsy. I am hesitant to start an account because I don't know how much time I will have to keep up my site. Can you give me any advice and information about how it works? I'd greatly appreciate it!"

Vintage Jack & Beanstalk Print from More Loose Ends

The first thing I would say is that the single best resource for learning how to sell on Etsy is Etsy itself! Since the site makes more money from successful sellers, they have a powerful incentive to see you succeed and they pour a lot of effort into helping new sellers turn into all stars. This is the first place to start.

That being said, it will take time and commitment to grow your shop. I discovered Etsy three years ago and instantly fell madly in love. I set up an account immediately and started listing items that week. It took months to nab that first sale and only after a great deal of trial and error, I've finally found a niche that works for me. Although it took me three years to get to where I am, I'm really proud of how far my humble little shop has come in that time.

It's easy to get sucked into searching for one magic bullet to start your creations flying out the door. Some people have had this experience, but I suspect it to be exaggerated. There is no magic bullet- It's more like magic beans that you have to plant and water and tend and then one day, you have a tiny shoot and before you know it, your little plant starts unfurling to the sun! You will need to master a combination of skills and be diligent in applying them, even when you can't tell if they are working or not. Obviously, this takes patience.

You will have to find your own combination of magic beans, but here are some of mine:

-Beautiful Photos: This cannot be overestimated. It takes time to learn how to do it well, so be patient with yourself. Here's a post I wrote on my journey to beautiful photographs.
-Re-listing Regularly: At the moment, I do this 4 to 5 times a day. I've noticed that my sales rise in proportion to the frequency of my listing, but I've also honed in on a special niche, so it's hard to say which is the key there.
-Lightweight Items: that are inexpensive to ship, even internationally. USPS is an amazing tool. If you take the time to understand the system, it gives you an enormous advantage. Sometimes I can ship my items for under $3.
-Product I can Duplicate Precisely: This means I don't have to re-photograph and re-write a new listing for every single item. Instead, I can click re-list or renew. If you run a vintage shop or one of a kind products, you can't do this. I urge you to include the photography and listing process in the final cost of your product. It is time consuming and you have to be paid for it.
-Charging for my time: This is difficult for me because I enjoy my work so much. What I've had to learn is that just because I like doing it doesn't mean it isn't valuable. Engineers don't feel guilty about their paychecks because they like solving mechanical problems. Remember that.
-Social Networking: Twitter, Facebook & Blogging have been effective for me, but they also come very naturally to me. I am an extrovert by nature and sharing things I'm interested in is lots of fun for me. This article is a great explanation of how social networking is changing online marketing.

Please do add questions and suggestions in the comments, I'd love to hear from you successful sellers out there, as well as newbies who are looking for support and encouragement.

Etsy has really changed my life in so many ways- it has given me an outlet for my work, a community of like-minded people, validation of my craft, an education on how to be a business person in the internet age and all of this has nourished my creative process and helped it to flourish. I wish the same for all of you.

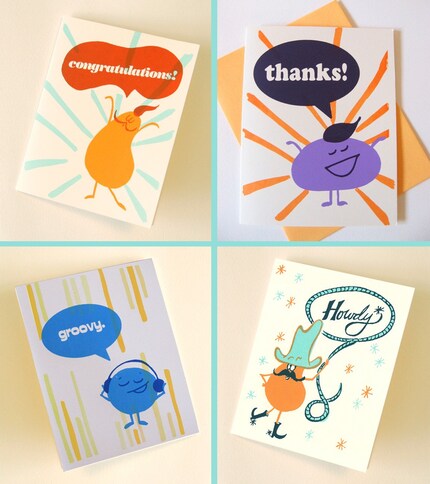
Bunch of Beans Cards by Fisk & Fern

Friday, July 30, 2010

Tea for Two

E and I threw a just for fun, just for two tea party the other day. I feel very lucky to have a husband who is happy to indulge silliness.

Note the extended pinkie finger. An important point of etiquette.


These tarts look fancy but are a cinch to make. Pastry dough rolled out & put into mini muffin tins (poke the bottoms with the tines of a fork to keep them from getting too puffy) at 350 for 5-10 minutes until golden brown. Let them cool a bit and then spoon in a bit of jam, whatever you have on hand will be scrumptious. Next time, I'm planning to roll mine out thinner though. These oatmeal raisin cookies are the best I've ever had bar none. Cream cheese, parsley & cucumber crustless sandwiches were another obvious touch.


Have you ever made an ordinary day special with a few fancy flourishes? I'd love to hear about it!

Thursday, July 29, 2010

Studio Peek: Owl Pendant Necklace Before & After


My friend Kristin gave me this funny little owl pendant. Very 1970's, no?

I cleaned it and updated it with some matte grey spray paint, but left his shiny black eyes as is. I also added a long black chain. He looks right at home with my beloved Lobster necklace, but you can add him to your collection if you like. He's right over here.


Wednesday, July 28, 2010

Nancy Did it First

Y'all know I love Zooey Deschanel and She & Him just as much as the next girly blogger, but one has to concede this point:

Nancy Sinatra did it 43 years ago.

Tuesday, July 27, 2010

Trailer Fantasy Explodes

Oh dear. If my gypsy trailer fantasies were ablaze before, they just encountered a barrel of nitrogen. KABOOM.


(It's called The Vintage Cupcake Trailer, just so you know.) I'm pretty sure that means they roam the countryside making cupcakes and looking for fields of wildflowers to park in. How can I bother living life as usual when I know that THIS is possible? Found via the always lovely Oh Joy.

Monday, July 26, 2010

My Joan Crawford Moment: Bringing Back the Turban


My fashion sense continues to get more eccentric, but I've thrown caution to the wind. Perhaps it's all the old movies I watch. Those ladies did not hold back for one second. They wore big, bold, head turning accessories, serious gowns, pounds of make-up and they had the guts to own it all. Yeah, it was Hollywood, but it all comes back to confidence, don't you think?

I live in Hawaii- where else can one parade around in pom pom bedecked caftans and Joan Crawford inspired turbans? People here wander around in swim trunks and slippahs (flip flops for you uninitiated) and little else, so I feel obliged to inch toward over the top, if only for my own entertainment. (Helpful fashion tip for those of you who would like to try this at home: You look less like a cancer patient if you let a bit of hair poke out the top of your turban!)


P.S) I bought my pom poms from the lovely Etsy supply shop Frog Feathers. I fell in love with her shabby rose trims too and ordered several yards- it's even prettier in person!

Saturday, July 24, 2010

Studio Peek: Party Hats for Everyone!

I've been having way too much fun in my studio whipping up these silly party hats. Aren't they a hoot?

This one is equal parts Mideval Princess and Burlesque Queen!

This one reminds me of a Circus (must be the ric rac!)- maybe worn by an old fashioned clown in a giant ruffled collar.

And this one is just plain Happy Summertime. Just right for July, don't you think? What are you working on lately?

Friday, July 23, 2010

Lightening My Load: In Defense of the Wristlet

Though historically, I like to keep lots of things handy in my purse, lately I want something tiny enough to toss into my beach bag or the compartment under the seat of my scooter. So today, my handbag is shrinking.

This little wristlet seemed like the perfect solution and it was on super duper clearance at Kate Spade. ($60 instead of $125! Follow them on Twitter & Facebook-they run sales constantly!) I've pared down to a few essentials: credit cards, cell phone, a little cache of Advil & mints, my trusty Burt's cuticle cream & lip balm and my Don Draper shades (find 'em cheaper on ebay!)

Here's to simplicity! Have you lightened your load lately? What small changes made a big difference for you?

Thursday, July 22, 2010

Rented Home Lesson: Art Ledges Are Genius!


One of the great things about renting is the fun of living with something you might not have chosen yourself. For example, I've never had an art ledge before, and they hadn't really occurred to me. But for a collector like me, they are a great solution because you can continually change and rotate your visual display. These ledges are in my studio and it's such fun to change up the configurations to keep it feeling fresh and new in here. (You can peek at a past configuration over here if you like.) What little tricks and tips have you learned living in a rented (or lucky you, in your very own) home? The other less fun lesson I've learned: eschew white tile floors at all costs. They never seem to look clean.

Wednesday, July 21, 2010

Tapioca + Crème Brûlée = Tapiolée!

I recently had a jolt of mad inspiration. I love tapioca. I love Crème brûlée. Why not combine the two? It was just crazy enough to work!

First, I prepared tapioca in the usual way, but with whole milk for extra decadence and poured it into these sturdy oven proof dishes. I chilled them overnight- not sure if this is a must or not. I'm just reporting the facts.

Then, I topped each serving with a layer of brown sugar with a sprinkling of white for good measure and smoothed the whole lot with the back of a spoon.

Next, I put them directly under the broiler for 7 minutes until they were just about ready to scorch. Remember, Crème brûlée means "burnt cream" and the French are devoted to taking carmelization as far as it will go before bursting into flames. This takes courage mes amis.

I recommend a cooling period lest one spoons molten hot lava directly into one's mouth. 5 minutes is enough for the sugar to harden into a delightful shell like the one Amelie so enjoyed cracking. This also gives you a bit of time to get all fancy with the garnishes. I chose raspberries from Costco and mint from my garden.

Savor your creation while it's still warm. So decadent. Bon Appétit!

Tuesday, July 20, 2010

Completed Cover Art for Madame B's 2010 Autobiographical CD

The elaborate song book liner notes I'd planned for my 2010 Autobiographical CD didn't materialize, but I'm quite pleased with the cover art. I used glossy reproductions of vintage tropical postcards as a backdrop. I painted a figure with acrylic paint and scratched away excess to create detail. Each of the self portraits each turned out differently and I quite like that they look like phantoms. I attached the postcards to the cover with photo corners and used a white pencil to write in the playlist.


Is there a favorite song for you that reminds you of the past year? I'd love to hear all about it!

Monday, July 19, 2010

How to Turn Your Snapshots into ART.

One of the biggest projects Kristin & I tackled for her home makeover was her photo display. She loves having images of her loved ones and favorite places on the walls to inspire her, but her collection of tabletop frames were cluttering up precious horizontal space. We decided to turn that clutter into a personal display of things that will inspire her every day- and invigorate her vertical space to boot!

Since I think this is a common challenge in most homes, I thought I'd share the process with you. As with so many things, a photo wall looks effortless, but actually requires a lot of thought and preparation to pull off elegantly. Here is my advice:

1) Be Choosy. Sort through your images and choose 10 or 11 absolute favorite all time shots. This can be difficult. Often times I have several versions of the same image and I like all of them. But put five shots from the same day on one wall, and you lose the visual impact. Instead of noticing the one great shot, they all become background noise. Be picky! You'll probably know in your gut which shot is the standout.

2) Now that you have these images, you are going to need to use Photo editing software to make them their absolute best. That's what this particular post is all about. I'm going to show you the difference between a cute snapshot and a gorgeous piece of art for your home.

3) Vary the SCALE. This is the number one mistake people make with photo display. They use regular old 4x6" photos in identical 4x6 photo frames- or worse- those precut mats with a zillion slots. This will not make your photos pop, feel special, or look like art. After you've photo shopped your images, upload them to Snapfish or Costco Photocenter. Make sure that you get a few 8x10's, at least one 11x14 and a scattering of 5x7 and 4x6. Keep the 2x3's for your vanity or bedside table- not the walls, unless they are in a larger mat.

4) Vary the Format. Make sure that all your photos aren't vertical or horizontal. You want a nice mix of both.

5) Vary the Presentation. Make sure that some of your frames have mats and some of them don't. Vary the size and look of the actual frame- not just the perimiter, but the frame itself. You want some big chunky ones and some elegant skinny ones. You can choose to mix and match wood, metal, black and white frames or stick to one color. I like the mismatched look because it feels like a collection that has built up over time instead of one that was purchased all on one day from a Pottery Barn Catalog.

Today I'd like to share the photo editing process with you. Kristin diligently chose 10 shots. Since she is celebrating her new life here in Hawaii, many of the shots were of favorite spots around the islands. The more personal the better- the idea is to tell your story and let yourself shine through.


Notice how cropping and adjusting the contrast is enough to make a big difference in this image.


I'm not a photo shop master by any means, but I thought this photo would look great if it were softened a bit. Eric suggested I google for a tutorial and this one was so easy to follow. I was thrilled with the result. One is a cute snapshot- the other two dewy goddesses! (Who wouldn't take advantage of a little computer trickery? All the supermodels do it!)


I used the same effect here and also yellowed the photo to give it a vintage feeling. This is Honaunau, one of Kristin's favorite snorkel spots- and the site of my map from this project!


I feel like this looks like a scene from the Sound of Music in the "after" photograph. So lush and verdant! I hope I've convinced you to be more discerning in your photo displays and to try a little embellishing on the computer. It makes a huge difference. I will be sharing the final steps in the process- including before and after photos of her apartment soon. Stay tuned!

Friday, July 16, 2010

Make Your Own Gift Enclosures

I love to make a beautiful first impression with packaging for my products- nothing heightens a customer's experience like a carefully packed box full of thoughtful details. I especially like to include a small hand written thank you with each purchase. I use recycled materials for my gift enclosures, but you'd never guess from the finished product- a fact I'm quite proud of. Here's how I make mine.


You will need:

Box Board: I save containers from products like cereal, crackers and "F.P's" as Sarah calls frozen pizzas. (Just so you know, the average F.P box fits a piece of 12x12" scrap booking paper perfectly. It's like the packaging engineers had us DIYers in mind!)
Adhesive: I prefer the spray.
Decorative Papers: Keep your eyes peeled. Catalogs and brochures are often quite pretty.
Paper cutter or scissors


Spray the printed side of the cardboard with adhesive and quickly apply your decorative paper. Let dry. My paper is a map from Honaunau- where the ancient Hawaiian Kings lived! I think it will add a little local flavor to my outgoing boxes.

Next, trim your cardboard so that it will fit inside your paper trimmer. Make your cards .25" smaller than the envelope you'd like them to fit inside.

Mine were 3 x 4.5 so I made them 2.75" x 4.25" to fit inside snugly.

The finished product! They look beautiful with the customer's name written boldly on the front with a Sharpie and sealed with a pretty sticker. What is your favorite packaging trick- for gift giving or marketing? I'm always looking for new ideas!

Thursday, July 15, 2010

Marlin Mailbox: Humble Humor

And speaking of whimsy, how funny is this Marlin Mailbox? Eric and I often pass it on our morning constitutional and I finally remembered to bring along my camera so I could photograph it for you. Life is too short for common objects to be industrial looking- why not inject a little humor where you can, right? What brings a smile to your lips in your neighborhood?

Wednesday, July 14, 2010

Before & After: Pin Cushion Lady!

Would you like to see another makeover? I found this sweet little pincushion from the delightful Etsy shop Recycled Wares and fell in love with her naive look.

She was sweet exactly as she was...

but I had something more sumptuous in mind.

I gave her a bath, a dab of fresh paint, some tinsel trim, a few floral pins and a massive satin bow that would make Eliza Doolittle green with envy.

Now she reminds me of Marie Antoinette! Haven't decided if I'm going to part with her yet or not. If you'd like to add her to your collection, you can send me an e-mail inquiry at thefabulousmissbATgmailDOTcom. I like to my tools to be whimsical as well as functional whenever possible- she certainly is bringing a little extra pizazz to my sewing projects at the moment. Do you have a cute pincushion? What does yours look like?
Related Posts Plugin for WordPress, Blogger...